


HDTV self-install
This installation guide is easy to use and will get you started with your HDTV.
If you requested no-contact installation, your installer will complete the work outside your home and will assist you over the phone. You and your installer will follow the step-by-step process together to get your video services connected and set up.
What you'll learn:
- Step 1: Connect your converter box
- Step 2: Connect your converter box to TV
- Step 3: Connect the power cord
- Step 4: Turn on the TV
- Step 5: Insert batteries
- Step 6: Turn on the converter box
- Step 7: Follow packing slip instructions
- Step 8: Set up your remote
- Looking for more support?
Get the Astound TV+ App
Get the Astound TV+ App
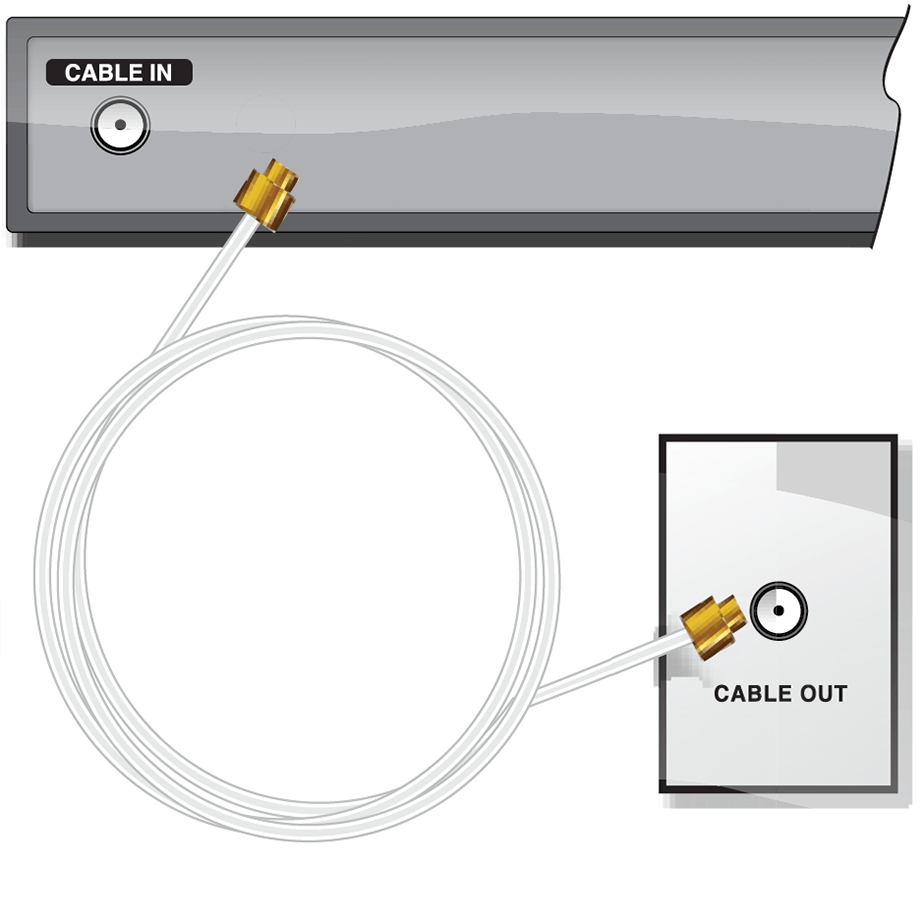
Step 1: Connecting your converter box
Wall Outlet
Connect one end of the coaxial cable to the wall outlet and the other end to the “Cable In” (or “RF IN”) connection on the back of the converter box.
Open Cable Wire
(This wire could be coming out of the floorboard, window, etc)
Connect the open cable to the “Cable In” (or “RF IN”) connection on the back of the converter box.

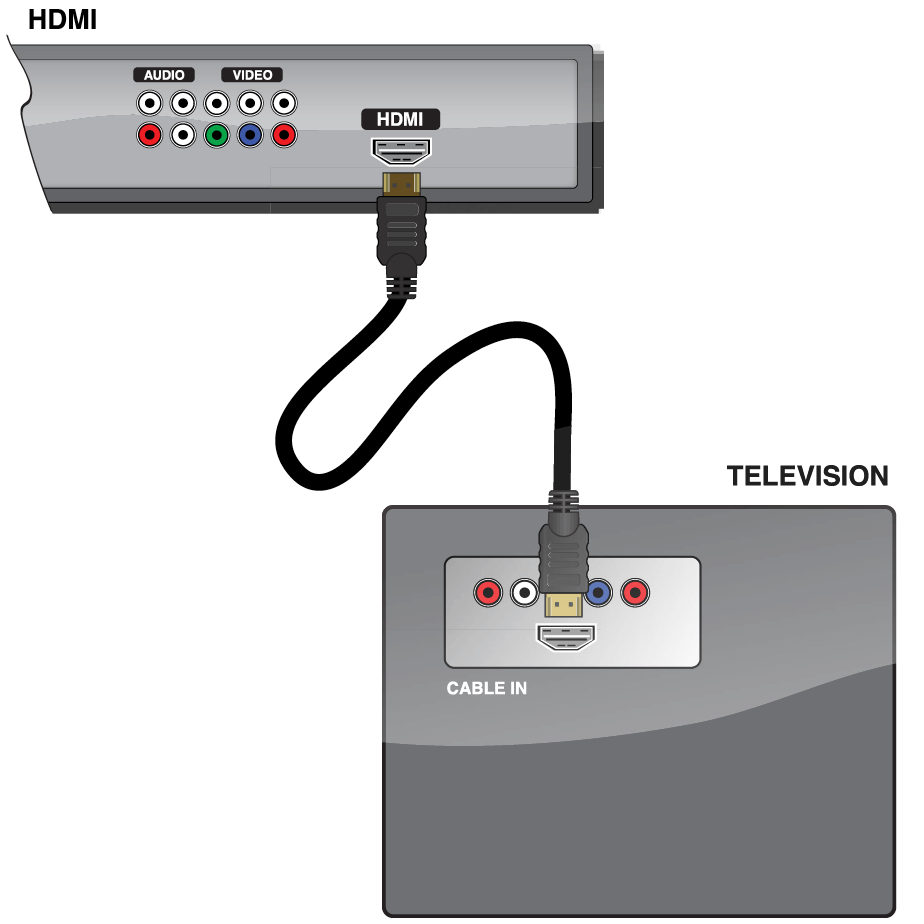
Step 2: Connect converter box to TV
You will install one of the following cables, HDMI or Component.
HDMI
Connect one end of the HDMI cable into the HDMI connection on the back of the converter box.
Next, connect the other end of the HDMI cable into the HDMI connection port on the back of your television.
High Definition Component Cable
Component
- Audio
Connect the black tip with red band into the audio output connection marked “R” and connect the black tip with the white band into the audio output connection marked “L” on the back of the converter box.
- Video
Connect the remaining cables into the corresponding RGB (Red, Green, Blue) video output connections.These ports are similarly located on the back of the converter box.
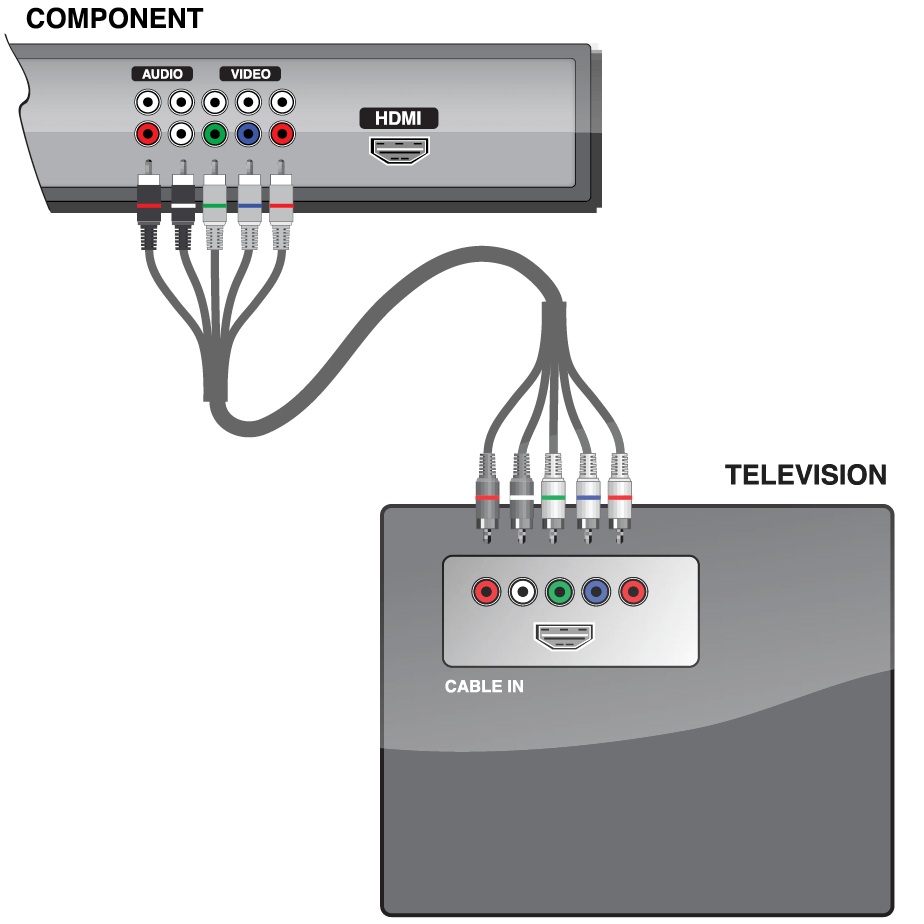
Television
Connect the opposite end of the component cable as follows:
- Audio
Connect the black tip with red band into the audio input connection marked “R” and connect the black tip with the white band into the audio input connection marked “L” on the back of your TV. - Video
Connect the remaining cables on that end into the corresponding RGB (Red, Green, Blue) video input connections on the back of your TV.
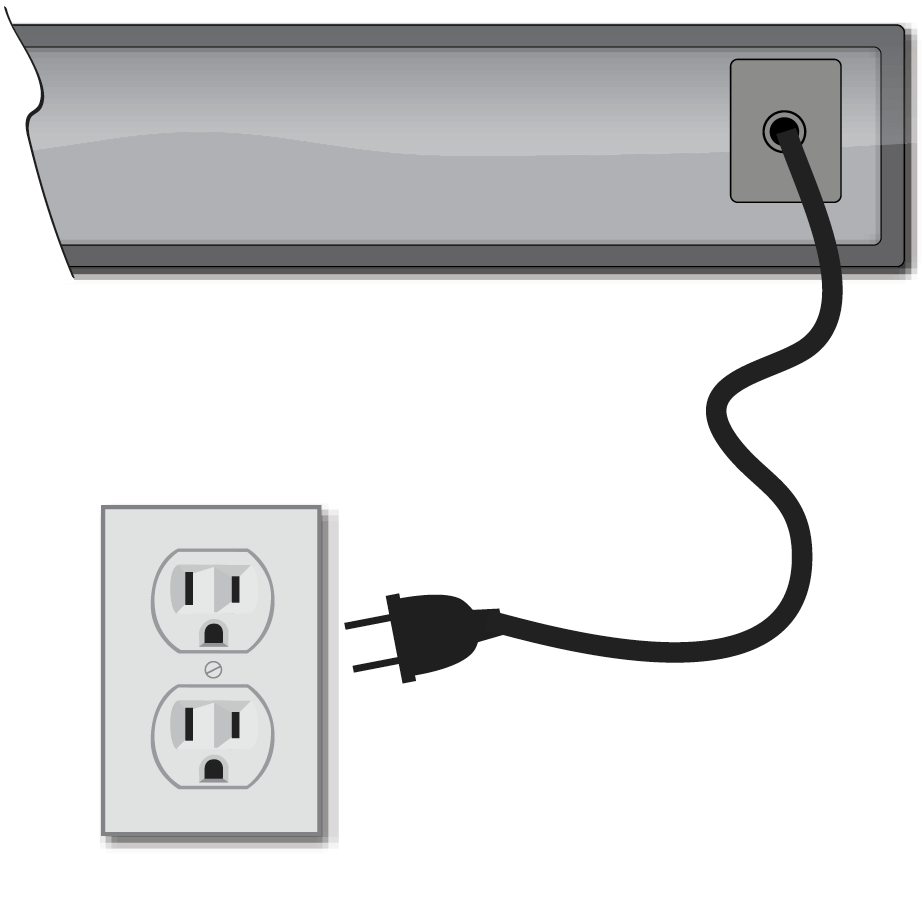
Step 3: Connect the power cord
Connect the power supply cord into the back of the converter box, then plug the other end into an electrical outlet.
Ensure a wall light switch does not control this outlet. If it does, set the switch to the “ON” position.
Step 4: Turn on the TV
Turn on the television with the TV remote. Press the “Input” or “Source” button.
Depending on which cable you installed in Step 2, select HDMI or Component video source on your TV.
Step 5: Insert batteries
Insert batteries into the remote control.
Step 6: Turn on the converter box
Press the CBL button on the remote. The power light on the converter box will illuminate.
Please Note: In order for your installation to be successful, you must install ALL converter boxes that are not yet connected. Follow the previous steps for the other converter boxes included in your order before continuing to the next step.
You are now ready to activate your converter box.
Step 7: Follow packing slip instructions
Locate your packing slip.
Follow the instructions on your packing slip to ensure proper account setup and optimum service.

Step 8: Remote instruction sheet
To utilize all the features of your remote control, please reference the instruction sheet included with your remote.
Congratulations! Enjoy the experience of HDTV.
Additional Support
If you need assistance after your installation, please don’t hesitate to contact us at 1.800.427.8686 or visit astound.com/support.
Our customer service agents are available to assist and answer questions 24 hours a day, 7 days a week.
Get the Astound TV+ App
Now that you’re connected to Astound TV service, you can download the Astound TV+ App on your Apple TV, Fire TV, phone, tablet and other devices.
Watch Live TV, news, sports and more—all through the app.* Download it. Watch it. Love it.
It’s TV outside the box.
Visit www.astound.com/astoundTVplus and download the app today!
*Ability to stream content out-of-home may be limited and is dictated by the content provider.
Quick links
Looking for something else?
Check out Astound Support Center for all help and support related information.
Not all services, speeds, packages, equipment, channels, tiers, pricing, streaming services, product offerings and product features are available in all areas. Offers valid only for new residential customers or previous customers with account in good standing who have not had our service within the last 60 days. All names, logos, images and service marks are property of their respective owners. Other restrictions may apply.